One of the things that provided endless fascination for me in Mexico and Central America was the creativity and innovation employed to create hand tools and appropriate technologies from available materials. We saw regionally distinct street stoves made from everything from bent sheet metal (Mexico City), adapted oil cans (San Cristobal de las Casas) to customised car wheels (Solola, Guatemala), all employed for the same task of cooking maize cobs (elotes) over coals.
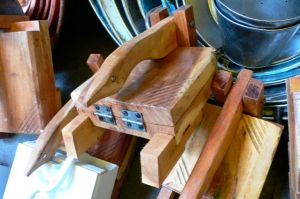
Wooden tortilladora, Mercado San Juan de Dios, Guadalajara, Mexico
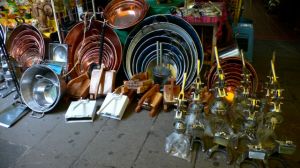
Steel and wooden tortilladoras in their natural habitat, Mercado San Juan de Dios, Guadalajara, Mexico
I was particularly taken by the tortilla presses (tortilladoras), usually made from wood or metal, once again with subtle regional variations in design. With a few photos of presses from Guadalajara’s San Juan de Dios market, and some sketches, on returning to Adelaide, I thought I’d try to replicate the concept.
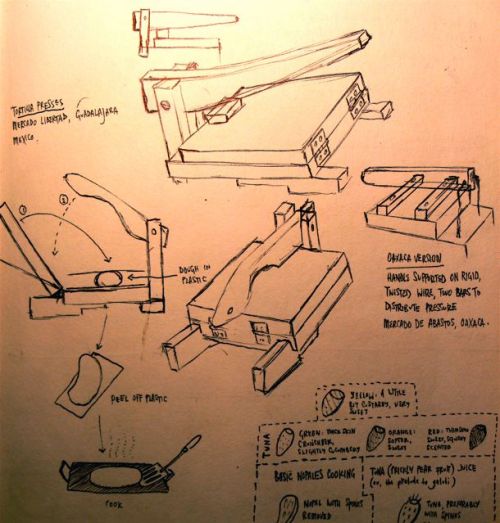
Sketches of tortilladoras, from my Mexican sketchbook
If making your own seems too terrifying for words, then you can get iron tortilladoras from Colorado Joel at Chile Mojo on the Parade, Norwood. They also sell maize flour, and various other Mexican and Southwestern US delicacies. However, you can get maize flour from most respectable bulk foods shops, and of course, experimentation with other, local flours is encouraged.
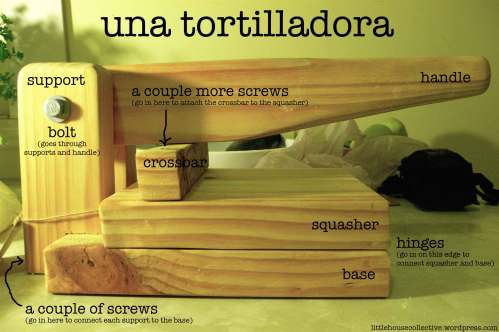
The tortilladora is a simple concept. It involves:
- 1 large, broad piece of timber for the base.
- 1 large piece of timber of same width but slightly shorter for the top piece. We’ll call this the “squasher”. These two pieces will be connected by hinges, and your tortilla dough will be squashed between them.
- 1 long piece for a handle that can be pulled down to push pieces 1 and 2 flat together.
- 2 pieces to attach to the base and to which the handle is bolted. We’ll call these the “supports”.
- 1 small piece, same as the width of the base to be the contact point between the handle and the top. We’ll call this the “crossbar”.
- 2 hinges with screws.
- 6 or 8 extra screws.
- 1 long bolt with its nut and 4 washers to hold the handle to the supports.
Have a look at the photo of the completed press and check you can identify all the bits described in the completed version.
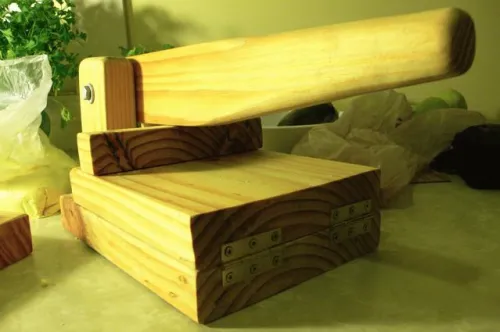
Hinge view of the tortilladora
1. I started by going through my dad’s collection of salvaged timber and found some bits of pine he must’ve picked up off a building site. I cut my base, squasher and crossbar from one piece, and the handle and 2 supports from a narrower beam.
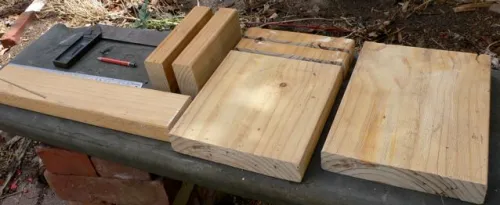
Pre-tortilladora timber: from left, the handle, 2 supports, the squasher, crossbars and base
2. Then, after a frenzy of sanding and filing the bits into shape I hinged the base and squasher together, and screwed the crossbar into place.
3. From here, I stood the supports upright, and place the handle where it would be bolted in place. Here is where the maths really kicks in: place the handle horizontal so its base is flat against the crossbar. Then measure, do sums or guess where you will drill holes through the supports so the handle is rests in that exact position. Drill the holes in the right spots through the top of both supports and the handle.
4. I stood the supports next to the base to figure out how much to saw out of the bottom of them (check the photo above to see how they’re attached). I cut out a small rectangle from their bases so they half sit on the base. I then attached them to the base with a couple of screws.
5. Now, all you need to do is ease the bolt through your pre-drilled holes and the handle, ensuring that there is a washer between each piece of wood. Screw the nut tight. You might like to wipe off the dust and oil the entire press with olive oil to protect the wood and bring out the colour.
Now, let’s hit the hotplate.
Perfect tortillas every time.
There’s some American dude here who’s decided to make his own video displaying his homemade press and offering a step-by-step guide to the operation of the press.
Here’s a text version of how we do it.
To make maize tortillas, you need:
- 2 cups of maize flour, or masa lista
- 1 teaspoon of sea salt
- 1 1/4 cups warm water (plus perhaps a little bit extra)
1. Combine flour and salt in a bowl and add the warm water. When the mixture is cool enough to touch (which might be immediately) mix with your hands. If the dough is a little dry, add warm water bit by bit until the dough stays together without crumbling.
2. Knead the dough for a couple of minutes, ensuring that there is enough moisture that it doesn’t crumble, and enough flour that it isn’t too sticky.
3. Pinch off the dough and it into smooth, round balls with your hands, covering the other dough to stop it drying out.
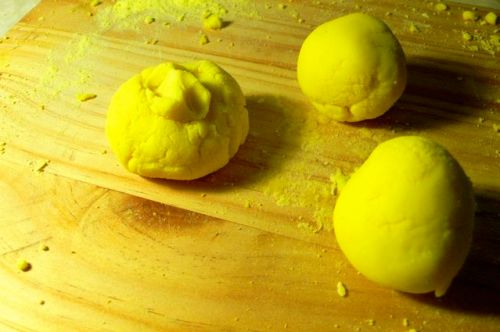
4. Now, the tortilladora enters the scene. Open the tortilladora, and lay cling wrap on the inside of the squasher and base (or you could try coating it with lots of flour, although I can’t vouch for its success). In Mexico, we saw people using plastic of about the consistency of a Zip-Lock bag so it can be washed, dried and reused.
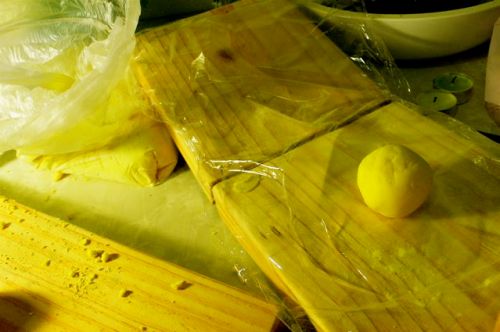
5. Place one of your small, unsuspecting balls of dough in the centre of the base.
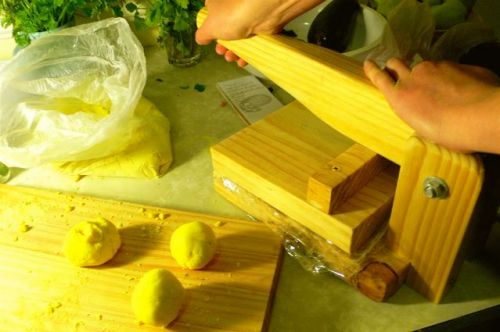
6. Close the press, and push the handle down.
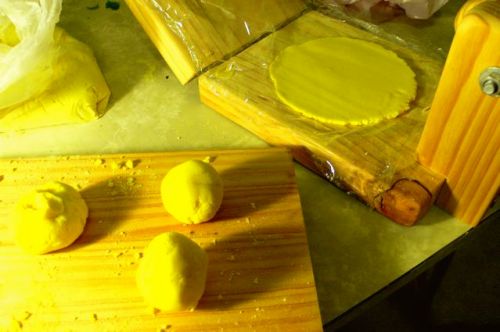
7. Open the tortilladora, and unpeel the top piece of plastic. Then, pick up the plastic, flip it over so the tortilla rests in your hand and peel the plastic off the tortilla. Then, drop the tortilla into a hot, heavy-based pan or hotplate. We use a well-seasoned cast-iron frying pan and it works well without oil. A bit of olive oil doesn’t hurt from time to time though.
8. Wheat flour tortillas are probably even easier than corn thanks to the magical elasticity of gluten, and there’s no reason why you can try them will all manner of other flours! Mexican cookbooks from your local library are sure to have everything you need.
Post by Joel.


Who Great collection of photographs here and such a full and extensive “How To”!!!!! Onya!
How thin can you get your tortillas/rotis/chapatis? Before I embark on this project, I’d like to know for sure I can make rotis near-paper thin.
Thanks!
Hey Fred! this tortilladora makes tortillas the thickness you’d get in Mexico and Central America, say 3 or 4mm. Not quite paper…but I hope you make it anyway! soph
just be carefull you’re NOT getting GMO corn flour.
Very true! We buy tortilla flour from the Clarence Park Food Co-op, and it explicitly says on the bags that it’s GMO-free.
I love that you have a “Mexican notebook”. A different notebook for various adventures? Anyway, I’m going to make my own tortilla press based on your excellent sketches.
Hi Andrew, and thanks for your comments! Once you’ve made your tortilla press, I’d love to see photos and we welcome any comments you have about things to consider when making them. We’ll add them to the blog if you like. Good luck!
hello from europe 🙂
thx for the tut. Very welcome! I am planning to use the press … once built … for pizza dough too.
Late reaction, but would it be possible to make a hinged version? So you can adjust the thickness of your tortillas/pizza bottoms? And do you really need plastic, or would baking paper and/or thoroughly oiling the surfaces also prevent the dough from sticking?
Hey Saskia, the version shown is hinged, if that’s what you mean, but not adjustable for thickness. I guess to vary the thickness, you just don’t press as hard! You could certainly use baking paper, and potentially oil the surfaces (I imagine that tortilla presses pre-date the advent of cheap plastic). The bonus of the plastic is that you can peel the plastic away from the tortilla, and not the tortilla from the surface, much more effective as the uncooked tortilla can be fragile.
Just whipped up one of these babies today with my mum. Used a piece of a door – silky oak and a broken axe handle. Looks a treat all oiled up!!! Am making tortillas tonight – thanks for the instructions – was easy to make (tho did help mum had all the heavy machinery at her house). Now if a chick without much woodworking experience and her 78 yo mum can knock this off – anyone can!!
Cheers
Hey Anne, thanks for your comment and great to hear that the instructions were useful! Do you have any photos of your finished press? I’d love to see them!
Here is what I do to vary the thickness of the squashed dough: I leave a bit more space between the two pieces (say 1/4 inch) and then use regular paper to make it as thick or thin as I like.
Pingback: Homemade, Whole Wheat Tortilla Shells. Soft, tasty and preservative-free. | My Healthy Green Family
Pingback: Una vera e propria tortilla messicana è fatta di mais. Ecco come. | L'Avocado Straniero
Im planning to make one of these this weekend, a question though, can you fry the pressed tortilla to make crispy chips? or do I have to cook them on a skillet first before throwing them into the oil?
I’d imagine you’ll have to dry cook them first. Reason being, masa is not sticky so getting the uncooked tortilla from the plastic to the pan requires an action almost like throwing, like you’re slapping it into the pan. An oily pan would splash and burn you. So pre cooking would allow a gentler action.
Hey there, it isn’t necessary to precook, you can just add a small amount of oil for the first couple, and once they’re done the rest will cook fine on the dry hot plate.
Pingback: Making Tortillas with a DIY Tortilla Press | My great WordPress blog
Just wanted to say thanks for the tutorial! I’d post a picture, but I can’t figure out how from my phone. It works great with the floured surface by the way.
Pingback: Mexican Food Just Like Olvera Street – julilah
Pingback: Tortilla Press Wood Plans – Ucok Wood Plans